General, IT Company Website Design, SEO, Social Media, Web Design & Development, Website Design Services
HVAC Website Design: How to Build a High-Converting Website for Your HVAC Business
If you run a heating and cooling company, your website is your most important salesperson — and it works around the clock. Whether a homeowner’s furnace breaks at 2 a.m. or they’re shopping for an air conditioning upgrade in the middle of summer, the first thing they do is search Google. If your HVAC website doesn’t show up — or shows up but fails to impress — you lose that customer to a competitor who simply has a better-designed site.
This guide is written specifically for HVAC contractors who want to understand what makes a great HVAC website, what features drive real leads, and what to look for when hiring a web design company that specializes in home services. Whether you’re starting from scratch or ready to replace an outdated site, this is the resource you need.
Why HVAC Contractors Need a Professional Website in 2026
The HVAC industry in the United States is worth over $25 billion and growing. According to the U.S. Bureau of Labor Statistics, employment of HVAC mechanics and installers is projected to grow 9% through 2032 — faster than the average for all occupations. That means competition is heating up (pun intended), and the contractors who invest in their digital presence will capture the most customers.
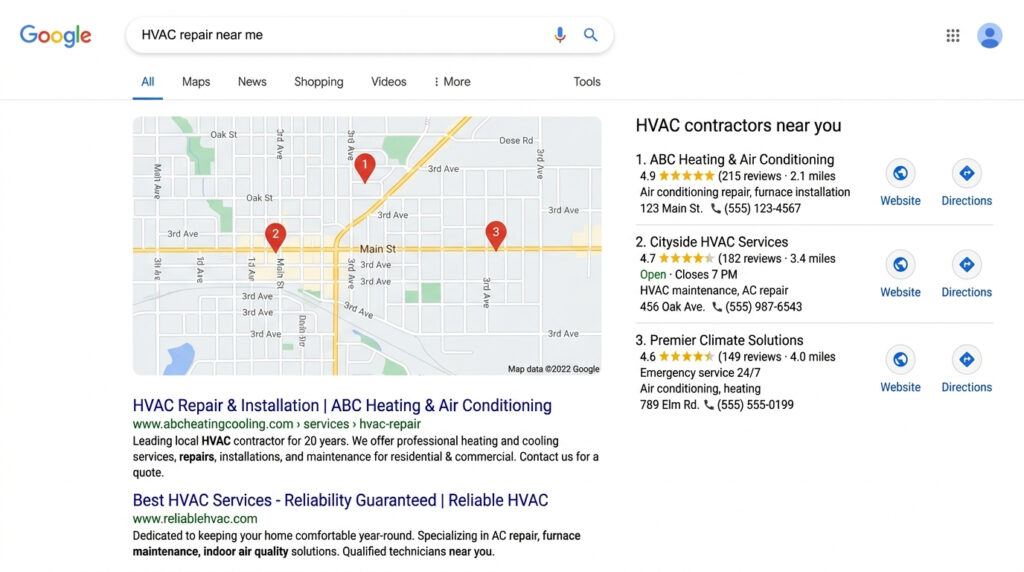
Here’s the reality: 97% of consumers search online before choosing a local service business (BrightLocal, 2024). When a potential customer types “HVAC repair near me” or “AC installation [city name]” into Google, they are ready to spend money. They just need to find the right business. Your website is that first handshake.
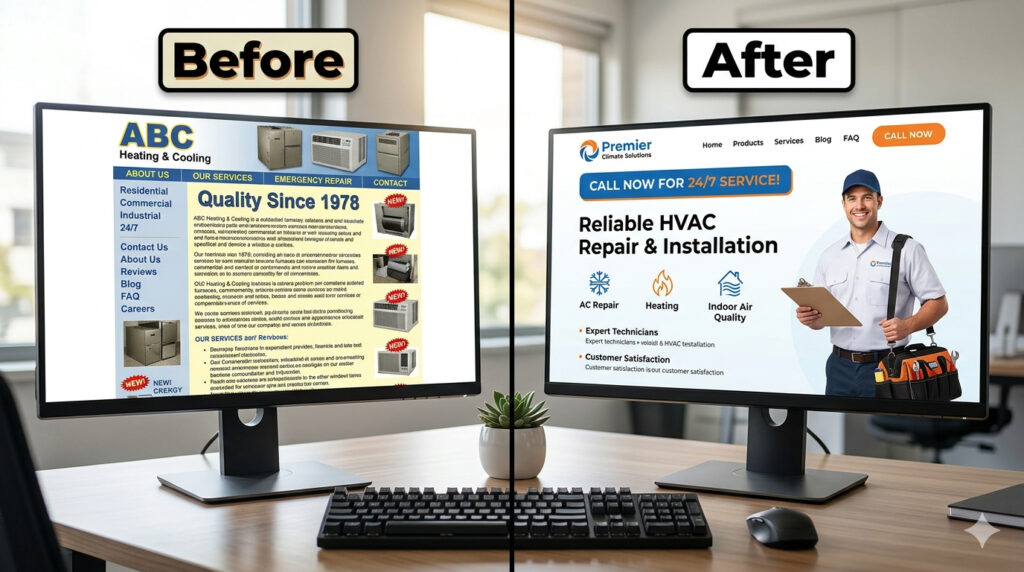
A poorly designed, slow, or outdated HVAC website sends all the wrong signals:
- It tells customers your business might not be credible.
- It fails to appear in local Google search results.
- It doesn’t convert visitors into phone calls or form submissions.
A professionally designed HVAC website, on the other hand, builds immediate trust, answers the questions customers are already asking, and makes it frictionless to book a service call.
Must-Have Features for Every HVAC Company Website
Not all websites are created equal. A great HVAC contractor website isn’t just pretty — it’s built with specific goals in mind: get the phone ringing, fill the contact form, and keep customers coming back. Here are the non-negotiable features every HVAC website must include.
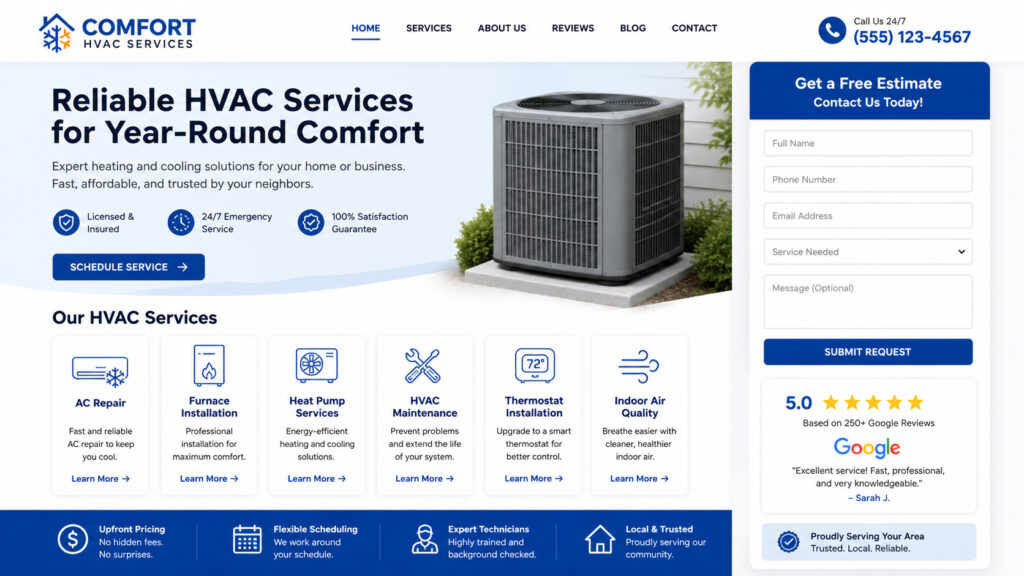
1. A Clear Call-to-Action (CTA) Above the Fold
The very first thing a visitor sees on your website — before they scroll even one inch — must tell them exactly what to do next. For HVAC companies, this is almost always one of two things:
- “Call Now: (555) 000-0000” — for emergency HVAC service calls
- “Get a Free Estimate” — for new installations and planned work
Your phone number should be clickable on mobile devices. Studies show that HVAC customers calling from a mobile phone are often in an urgent situation (broken AC in July, no heat in January). Make that call button impossible to miss.
2. Dedicated HVAC Service Pages
One of the biggest SEO mistakes HVAC companies make is putting all their services on a single page. Instead, create a dedicated page for each major service:
- AC Installation
- AC Repair
- Furnace Installation
- Furnace Repair
- Heat Pump Services
- HVAC Maintenance Plans
- Indoor Air Quality
- Commercial HVAC
- Emergency HVAC Service
Each page should be optimized for its own keyword. For example, a page titled “AC Repair in [Your City]” can rank independently on Google and capture highly targeted traffic from homeowners searching for exactly that service.

HVAC service page website layout mockup showing
3. Trust Signals That Convert Visitors Into Customers
HVAC is a high-trust industry. Technicians enter people’s homes, work on expensive equipment, and charge significant sums. Your website must answer the question every visitor is silently asking: “Can I trust this company?”
Key trust signals to include on your HVAC website:
- Google Reviews embedded or linked (shoot for 50+ reviews, 4.5 stars or higher)
- Better Business Bureau (BBB) accreditation badge
- NATE-certified technician badges
- Years in business prominently displayed
- Licensing and insurance information
- Before-and-after project photos
- Video testimonials from satisfied customers
4. Mobile-First Design
More than 60% of all local service searches happen on a smartphone (Google, 2024). An HVAC website that looks great on a desktop but breaks on mobile is losing more than half its potential leads. Your website must be responsive — meaning it automatically adapts its layout and font sizes for any screen size, from a 4-inch phone to a 27-inch monitor.
Mobile-first design also matters for Google rankings. Since 2021, Google uses mobile-first indexing, which means Google evaluates your mobile site when deciding where to rank you in search results.
5. Fast Page Load Speed
If your HVAC website takes more than 3 seconds to load, over half of your visitors will leave before they ever see your services. Google’s Core Web Vitals — a set of performance metrics — directly impact your search rankings. A fast, well-coded website isn’t just a user experience upgrade; it’s an SEO requirement.
6. Online Booking or Contact Form
Many homeowners today — especially younger Millennials and Gen Z customers — prefer to request a service call online rather than pick up the phone. Your website should include a simple, easy-to-complete contact form with fields for:
- Name
- Phone number
- Email
- Service type (dropdown)
- Preferred appointment date/time
- Brief description of the issue
The simpler the form, the higher the conversion rate. Don’t ask for more information than you need at this stage.
7. Emergency Service Banner
HVAC emergencies don’t follow business hours. A dedicated banner or sticky header that highlights 24/7 emergency HVAC service — with a clickable phone number — can dramatically increase emergency call volume from your website.
How to Design an HVAC Website That Ranks on Google
Having a beautiful HVAC website is only half the battle. If no one can find it, it doesn’t generate leads. Local SEO (Search Engine Optimization) is the practice of making your website visible to customers in your geographic service area when they search for HVAC services.
Local Keyword Strategy for HVAC Companies
The most valuable HVAC keywords combine a service type with a geographic location:
- “HVAC contractor [city name]”
- “AC repair [city name]”
- “furnace replacement [city name]”
- “air conditioning installation near me”
- “emergency HVAC service [zip code]”
Every major service page on your website should be optimized for one of these location-specific keyword combinations. This is known as local landing page SEO, and it’s one of the most effective tactics for getting HVAC companies to the top of Google.

Local Keyword Strategy for HVAC Companies
Google Business Profile Optimization
Your HVAC website must be connected to a fully optimized Google Business Profile (formerly Google My Business). This is the listing that appears in Google Maps and the local “3-pack” — the three businesses that appear at the top of local search results. Key optimization steps include:
- Complete every section of your profile (services, hours, service area, photos)
- Collect and respond to Google Reviews consistently
- Post weekly updates using the “Posts” feature
- Add your website URL and booking link
External resource: Google Business Profile Help Center — The official guide to managing your listing.
Schema Markup for HVAC Websites
Schema markup is structured data code added to your website that helps search engines — and AI assistants like Google Gemini and ChatGPT — understand exactly what your business does and where it operates. For HVAC companies, the most important schema types are:
- LocalBusiness schema with your NAP (Name, Address, Phone)
- Service schema for each HVAC service you offer
- FAQPage schema for your FAQ section
- Review schema to display star ratings in search results
When properly implemented, schema markup can earn rich snippets in Google — enhanced search results that stand out visually and dramatically increase click-through rates.

article rich result
Content Marketing for HVAC Companies
Beyond service pages, publishing helpful blog content is one of the most powerful ways to build long-term SEO authority for your HVAC website. Topics that consistently attract organic traffic include:
- “How often should I replace my air filter?”
- “Signs your AC unit needs to be replaced”
- “What is SEER rating and why does it matter?”
- “Heat pump vs. furnace: which is right for my home?”
- “How to prepare your HVAC system for winter”
These educational articles attract homeowners who are researching, not yet ready to buy — but they’ll remember the HVAC company that answered their question, and they’ll call that company when they are ready.
What Makes the Best HVAC Websites Stand Out
After building websites for home service companies across the country, we’ve identified the design and content elements that consistently separate the best HVAC websites from the average ones.
Professional photography matters. Generic stock photos of smiling technicians that every HVAC company uses are immediately recognizable — and they signal a lack of authenticity. Real photos of your team, your vehicles, your equipment, and your actual job sites build far more trust.
Clear service area pages. If you serve 10 cities, you should have 10 city-specific landing pages — each one mentioning local landmarks, neighborhoods, and service history in that area. This geographic depth tells Google you are the authority in each location.
Financing options. HVAC systems are a major purchase — often $5,000 to $15,000 or more for a full system replacement. Displaying financing options prominently (e.g., “0% APR for 18 months”) removes a major objection and closes more customers.
Seasonal promotions. A homepage banner promoting a spring AC tune-up special or a fall furnace inspection deal creates urgency and drives call volume during typically slower seasons.
What Makes the Best HVAC Websites Stand Out
How Much Does HVAC Website Design Cost?
HVAC website design costs vary widely based on the scope of the project, the number of pages, and the level of SEO work included. Here’s a general breakdown:
| Website Type | Features | Estimated Cost |
|---|
| Basic 5-page website | Home, About, Services, Contact, Blog | $800 – $2,000 |
| Standard business website | 10-15 pages, basic local SEO | $2,000 – $5,000 |
| Full local SEO website | 20+ pages, city landing pages, schema, speed optimization | $5,000 – $12,000+ |
| Ongoing SEO retainer | Monthly content, GBP management, link building | $500 – $2,500/month |
The right investment depends on your market size, competition level, and growth goals. In highly competitive markets like Houston, Phoenix, or Chicago, investing in a robust local SEO-driven website is often the difference between landing on page one of Google or being invisible.
At Black Web Spider, we specialize in web design for home service companies and offer transparent, flat-rate pricing with no hidden fees. Get a free estimate today and find out exactly what it will cost to build a website your HVAC business deserves.
Why Hire a Niche Web Design Agency for Your HVAC Business
Working with a web designer who has experience in the home services industry — specifically HVAC — gives you a significant advantage over working with a generalist agency.
A niche agency already understands:
- How HVAC customers search and what motivates them to call
- Which trust signals matter most in home services
- How to structure service pages for maximum local SEO impact
- What a high-converting HVAC contact form looks like
- How to write copy that speaks directly to a homeowner’s pain points
At Black Web Spider, we’ve built websites for cleaning companies, construction contractors, wood floor refinishing services, fire restoration companies, and many other home service businesses. We bring that same niche expertise to every HVAC website we design.
We don’t use cookie-cutter templates. Every website we build is custom-designed for your brand, your service area, and your specific growth goals.
Frequently Asked Questions About HVAC Website Design
How long does it take to build an HVAC website?
A basic HVAC website typically takes 2 to 4 weeks to design and launch. A more comprehensive site with multiple service pages, city landing pages, and SEO optimization can take 6 to 10 weeks. The timeline depends on how quickly you provide content, photos, and feedback during the design process.
Do I need a separate page for each HVAC service?
Yes, absolutely. Each service page — AC repair, furnace installation, heat pump services, etc. — should be its own dedicated page. This allows each page to rank for its own targeted keyword, multiplying your chances of appearing in Google search results across different service types.
How do I get my HVAC website to rank on Google?
Ranking on Google requires a combination of on-page SEO (optimized content, title tags, meta descriptions, schema markup), technical SEO (fast load speed, mobile-friendly design, proper URL structure), and off-page SEO (Google Business Profile optimization, local citations, customer reviews). A professionally built HVAC website addresses all three of these pillars from day one.
Can AI assistants like Google Gemini and ChatGPT recommend my HVAC business?
Yes — and this is increasingly important. AI search tools pull from structured, well-organized web content to answer user questions. Websites that use schema markup, clear FAQ sections, detailed service descriptions, and authoritative content are more likely to be cited by AI tools like Google Gemini, ChatGPT, and Perplexity. This is known as AEO — Answer Engine Optimization — and it’s a key part of our web design approach at Black Web Spider.
What platform is best for an HVAC company website?
WordPress is the industry standard for HVAC contractor websites — and for good reason. It’s flexible, SEO-friendly, and powers over 43% of all websites on the internet. With the right HVAC-focused theme and plugins, WordPress gives you full control over your content, local SEO, and site performance without locking you into a proprietary system. Learn more: Benefits of Using WordPress for Web Design.
Should my HVAC website have a blog?
Yes. A blog allows you to target long-tail, informational keywords that attract homeowners earlier in the buying journey. It also signals to Google that your site is active and authoritative. Publishing one well-researched blog post per month can meaningfully improve your search rankings over time.
What information should be on my HVAC company’s homepage?
Your HVAC homepage should include: your primary service (e.g., “Heating & Cooling Services in [City]”), a clickable phone number, a brief description of what you do and who you serve, your key services with links, trust signals (reviews, certifications, years in business), and a clear call to action (contact form or estimate button).
Ready to Build Your HVAC Website?
Your competitors are online. Your customers are searching. The question is whether they find you — or someone else.
At Black Web Spider, we build high-performance websites for HVAC contractors and home service businesses across the United States. From the first design mockup to launch day and beyond, we’re with you every step of the way.
Get Your Free HVAC Website Estimate Today →
You can also view our portfolio to see examples of home service websites we’ve built, or read more about our web design services to understand everything we offer.
Have questions? Contact our team — we respond within one business day and never use aggressive sales tactics.
Construction Company Website Design, General, Website Design Services
Sealcoating businesses are highly competitive, especially in local markets. If your company isn’t showing up online—or your website isn’t converting—you’re leaving money on the table.
A professionally built sealcoating web design isn’t just about looking good. It’s about generating leads, ranking on Google, and turning visitors into paying customers.
In this guide, you’ll learn how to create a high-converting website for your asphalt or sealcoating business—and how to dominate your local market.
Why Sealcoating Businesses Need a Professional Website
Most customers today search online before hiring a contractor. If your business doesn’t have a strong online presence, your competitors will win those jobs.
Key Benefits:
- 📈 Increased local visibility
- 📞 More calls and quote requests
- 💼 Stronger brand credibility
- 🧲 Consistent lead generation
A well-designed website works as your 24/7 sales machine.
👉 You can explore our dedicated service here: /sealcoating-web-design/
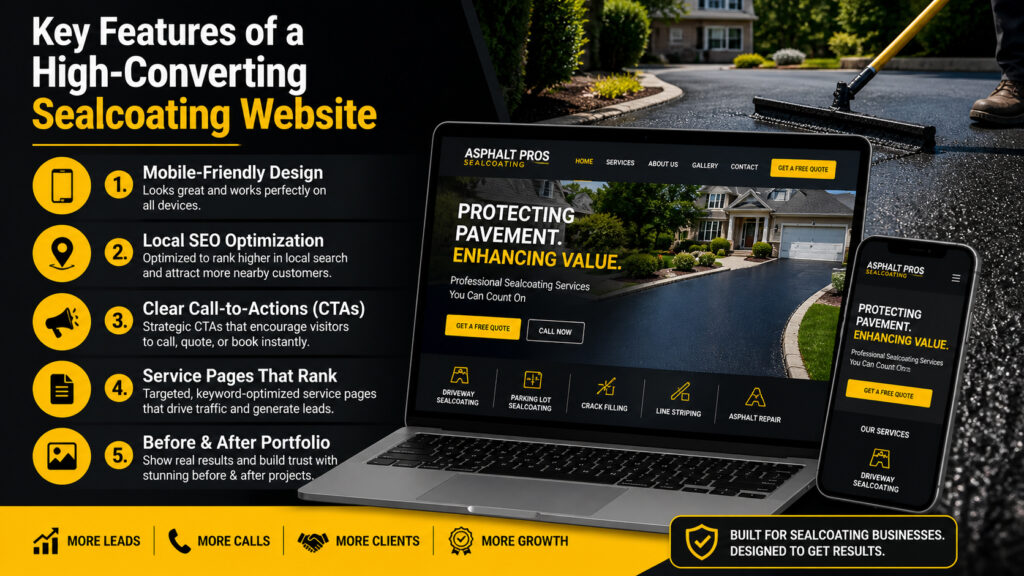
Key Features of a High-Converting Sealcoating Website
Not all websites are built the same. A sealcoating website must be designed specifically for local service conversion.
Key Features of a High-Converting Sealcoating Website
1. Mobile-Friendly Design
Most users search on mobile. Your website must:
- Load fast
- Be easy to navigate
- Have click-to-call buttons
👉 Related: /the-ultimate-guide-to-optimizing-your-wordpress-website-for-mobile-users/
2. Local SEO Optimization
To rank on Google, your site must include:
- Location-based keywords (e.g., “sealcoating in [city]”)
- Google Business Profile integration
- Schema markup
👉 Learn more: /seo-101-how-to-optimize-your-website-for-maximum-visibility-and-impact/
3. Clear Call-to-Actions (CTAs)
Your website should guide users to take action:
- “Get a Free Estimate”
- “Call Now”
- “Request a Quote”
👉 Use your page: /free-website-design-estimate/
4. Service Pages That Rank
Create dedicated pages for:
- Driveway sealcoating
- Parking lot sealcoating
- Asphalt repair
This helps you rank for multiple keywords.
5. Before & After Portfolio
Visual proof builds trust instantly. Show:
- Completed projects
- Transformations
- Real results
👉 Link: /website-design-portfolio/
Best Design Practices for Sealcoating Websites
Design matters—but strategy matters more.
Focus on:
- Clean layout (avoid clutter)
- High-contrast colors (black + yellow works well for asphalt brands)
- Fast loading speed
- Trust signals (reviews, testimonials)
👉 See examples: /web-design-testimonials/
SEO Strategy for Sealcoating Websites (2026)
To rank in 2026, your website must align with both Google SEO and AI-driven search (AEO + LLMs).
1. Answer-Based Content (AEO)
Include direct answers to questions like:
- “How much does sealcoating cost?”
- “How often should asphalt be sealed?”
This helps you appear in featured snippets and AI results.
2. Topical Authority
Create blog content around:
- Asphalt maintenance tips
- Cost guides
- Seasonal sealcoating advice
👉 Add content under:
/category/web-design-development/
/category/seo/
3. Internal Linking Strategy
Link your pages smartly:
- Service → Blog
- Blog → Service
- Homepage → Key services
This improves crawlability and rankings.
Common Mistakes to Avoid
Many sealcoating businesses fail online because of these mistakes:
❌ Slow website speed
❌ No SEO optimization
❌ No clear CTA
❌ Poor mobile experience
❌ Generic templates
Avoid these, and you’ll already be ahead of 80% of competitors.
Why Choose Black Web Spider for Sealcoating Web Design
At Black Web Spider, we specialize in building websites for service-based businesses like yours.
What you get:
- Custom design tailored to your brand
- SEO-optimized structure
- Lead-focused layout
- Fast, secure, mobile-friendly website
👉 Learn more:
Final Thoughts
A powerful sealcoating website isn’t optional anymore—it’s essential.
If you want more calls, more leads, and more jobs, investing in professional sealcoating web design is one of the smartest decisions you can make.
Sealcoating Web Design FAQs
What is sealcoating web design?
Sealcoating web design is a specialized website built for asphalt and paving businesses to generate leads and rank in local search results.
How much does a sealcoating website cost?
Costs vary depending on features, but a professional website typically ranges from $500 to $3000+.
How can I get more leads from my website?
By using SEO, strong CTAs, fast loading speed, and mobile optimization.
How long does it take to build a website?
Most sealcoating websites can be completed within 1–3 weeks.
Do I need SEO for my sealcoating business?
Yes. Without SEO, your website won’t rank, and customers won’t find you online.
General
What Are Google AI Tools?
Google AI tools are artificial intelligence platforms developed by Google to help businesses and developers automate tasks, build machine learning models, and create AI-powered applications.
These tools include:
- Gemini (AI chatbot)
- Vertex AI (ML platform)
- TensorFlow (AI framework)
- Google Cloud AI APIs
List of Google AI Tools
Here is a complete list of major Google AI tools:
- Google Gemini
- Vertex AI
- Google AI Studio
- TensorFlow
- Google AutoML
- Google Cloud AI APIs
- Google DeepMind
- Google Colab
- MediaPipe
- Google Imagen
- MusicLM
- Duet AI
- Gemini API
- Google Translate AI
- Google Assistant
Best Google AI Tool
The best Google AI tool is Google Gemini because it supports multimodal AI (text, images, and code) and integrates with Google Workspace and Search.
Are Google AI Tools Free?
Some Google AI tools are free, such as Google Colab and Gemini (basic version), while advanced tools like Vertex AI require payment based on usage.
Google AI Tools (2026) Introduction
This is the most complete and updated list of Google AI tools available in 2026. Artificial Intelligence is rapidly transforming how businesses operate online. Google has been at the forefront of this revolution, developing powerful AI tools for developers, businesses, marketers, and everyday users.
In this comprehensive guide, we list all major Google AI tools, including their features, benefits, and official links.
List of all major Google AI tools 2026
If you’re a business owner looking to implement AI into your website, explore our web design and digital marketing services:
👉 https://blackwebspider.com/services/
1. Google Gemini (formerly Bard)
👉 https://gemini.google.com/
Summary
Google Gemini is Google’s flagship AI chatbot and assistant designed to compete with ChatGPT. It integrates deeply with Google services.
Features & Benefits
- Advanced conversational AI
- Multimodal (text, image, code understanding)
- Integration with Gmail, Docs, and Search
- Real-time information access
Use Cases
- Content writing
- Coding assistance
- Research & automation
2. Google Vertex AI
👉 https://cloud.google.com/vertex-ai
Summary
Vertex AI is a unified ML platform that allows developers to build, deploy, and scale AI models.
Features & Benefits
- AutoML + custom model training
- MLOps lifecycle management
- Integration with Google Cloud
- Generative AI APIs
Best For
- Enterprises
- AI developers
- SaaS platforms
3. Google AI Studio
👉 https://aistudio.google.com/
Summary
Google AI Studio helps developers quickly prototype and experiment with Gemini models.
Features & Benefits
- Prompt testing interface
- API key generation
- Fast prototyping
- Easy integration
4. TensorFlow
👉 https://www.tensorflow.org/
Summary
TensorFlow is an open-source machine learning framework widely used for AI development.
Features & Benefits
- Scalable ML models
- Supports deep learning
- Strong community support
- Works across platforms
5. Google AutoML
👉 https://cloud.google.com/automl
Summary
Google AutoML enables users with limited coding knowledge to build ML models.
Features & Benefits
- No-code/low-code AI
- Image, text, and video AI models
- High accuracy training
6. Google Cloud AI APIs
👉 https://cloud.google.com/apis
Summary
Google offers pre-trained AI APIs for developers.
Key APIs
- Vision AI
- Speech-to-Text
- Natural Language AI
- Translation AI
Benefits
- Easy integration
- Scalable infrastructure
- Real-time processing
7. Google DeepMind
👉 https://deepmind.google/
Summary
Google DeepMind is Google’s advanced AI research division.
Key Innovations
- AlphaGo
- AlphaFold
- Reinforcement learning breakthroughs
8. Google Colab (Colaboratory)
👉 https://colab.research.google.com/
Summary
Google Colab is a cloud-based Python notebook for AI and data science.
Features & Benefits
- Free GPU/TPU access
- No setup required
- Ideal for ML experimentation
9. MediaPipe
👉 https://mediapipe.dev/
Summary
MediaPipe is used for building real-time perception pipelines.
Features
- Face detection
- Hand tracking
- Pose estimation
10. Google Imagen (Text-to-Image AI)
Summary
Google Imagen generates high-quality images from text prompts.
Features
- Photorealistic outputs
- Creative design generation
- AI art creation
11. Google MusicLM
Summary
MusicLM creates music from text descriptions.
Features
- Text-to-music generation
- Style-based composition
- Creative production tool
12. Google Duet AI (Workspace AI)
👉 https://workspace.google.com/
Summary
Duet AI integrates AI into Google Workspace apps.
Features
- AI writing in Docs
- Email drafting in Gmail
- Spreadsheet automation
13. Google Bard API / Gemini API
👉 https://ai.google.dev/
Summary
Allows developers to integrate Gemini into applications.
Features
- LLM API access
- Custom AI app development
- Scalable deployment
14. Google Translate AI
👉 https://translate.google.com/
Summary
Google Translate uses AI for real-time multilingual translation.
Features
- 100+ languages
- Voice & camera translation
- Real-time conversation mode
15. Google Assistant AI
👉 https://assistant.google.com/
Summary
Google Assistant is an AI-powered voice assistant.
Features
- Voice commands
- Smart home control
- Personalized responses
Why These Google AI Tools Matter for Your Business
Integrating Google AI tools into your website can:
- Improve user experience
- Automate workflows
- Boost SEO rankings
- Increase conversions
AI Comparison Table (Gemini vs ChatGPT vs Claude)
Gemini vs ChatGPT vs Claude (Quick Comparison)
| Feature | Google Gemini | ChatGPT | Claude |
|---|
| Developer | Google | OpenAI | Anthropic |
| Multimodal | ✅ Yes (text, image, code) | ✅ Yes | ✅ Yes |
| Real-time data | ✅ Yes (via Google Search) | ⚠️ Limited | ⚠️ Limited |
| Best for | Google ecosystem users | General AI tasks | Long-form writing |
| Coding ability | ✅ Strong | ✅ Very strong | ✅ Good |
| Integrations | Gmail, Docs, Search | Plugins, API | API |
| Free version | ✅ Yes | ✅ Yes | ✅ Yes |
| Enterprise tools | Vertex AI | ChatGPT Enterprise | Claude for Teams |
Which AI Tool is Best?
- Best overall AI: Google Gemini
- Best for coding: ChatGPT
- Best for writing: Claude
Google Gemini is best for real-time data and Google integrations, ChatGPT is best for coding and versatility, and Claude is best for long-form content and safe AI outputs.
Which AI Tool Should You Choose?
- Choose Gemini if you use Google Workspace
- Choose ChatGPT for advanced coding & automation
- Choose Claude for content writing and analysis
If you want a custom AI-powered website, check our portfolio:
👉 https://blackwebspider.com/website-design-portfolio/
Or request a free quote:
👉 https://blackwebspider.com/free-website-design-estimate/
Related Resources
FAQs About Google AI Tools
What is the most powerful Google AI tool?
Google Gemini is currently the most advanced AI tool for general use, combining text, image, and code capabilities.
Are Google AI tools free?
Some tools like Google Colab and Gemini have free versions, while others (Vertex AI, APIs) are paid.
Can I use Google AI for my website?
Yes, you can integrate Google AI using APIs like Gemini, Vision AI, and NLP tools.
Which Google AI tool is best for developers?
Vertex AI and TensorFlow are the best choices for building and deploying AI models.
How can AI improve SEO?
AI helps with:
- Keyword research
- Content generation
- User behavior analysis
- Technical SEO automation
Final Thoughts
Google continues to dominate the AI ecosystem with tools that serve developers, businesses, and marketers alike. Whether you’re building a website, automating workflows, or improving SEO, these tools can give you a significant competitive advantage.
If you’re ready to integrate AI into your website, contact our team today:
👉 https://blackwebspider.com/contact-us/
This article is written by Black Web Spider, a professional web design and digital marketing agency specializing in AI-powered websites.
General
You’ve just installed WordPress. You’re staring at a blank dashboard, excited about building your website. But here’s the problem: vanilla WordPress is like a smartphone without apps—functional, but missing the features that make it truly powerful.
The good news? WordPress plugins can transform your basic site into a marketing machine, complete with analytics, SEO optimization, social sharing, and bulletproof security. The bad news? There are over 60,000 plugins in the WordPress repository, and choosing the wrong ones can slow down your site or create security vulnerabilities.
Here’s what most beginners don’t realize: you don’t need dozens of plugins. You need the right 10-15 essential plugins that cover all the critical functionality your website requires to succeed.
In this comprehensive guide, I’ll walk you through the top 10 essential plugins for WordPress that every website needs in 2025—from analytics and SEO to backups and performance optimization. These aren’t random picks; they’re battle-tested solutions that power millions of successful WordPress sites.
How to Choose Essential Plugins for Your WordPress Site
Before we dive into specific plugins, let’s talk about smart plugin selection. Installing too many plugins is one of the biggest mistakes WordPress beginners make.
The Real Cost of Plugin Overload
Every plugin you install adds code to your website. More code means:
- Slower page loading times (hurting WordPress performance)
- More potential security vulnerabilities
- Increased compatibility conflicts
- Higher maintenance burden (updates, troubleshooting)
- Greater resource consumption on your server
The sweet spot: Most well-optimized WordPress sites run 15-25 plugins maximum. Quality matters infinitely more than quantity.
Key Criteria for Essential Plugins
When evaluating whether a plugin deserves a spot on your website, ask these critical questions:
1. Does it solve a specific problem? Install plugins only when you have a clear need. Don’t install a plugin “just in case” or because it seems cool. Every plugin should serve a defined purpose that directly benefits your website goals.
2. Is it actively maintained? Check when the plugin was last updated. Plugins abandoned for over a year pose security risks and may not work with current WordPress versions. Look for plugins updated within the last 3 months.
3. Does it have good reviews and support? Check the plugin’s rating (aim for 4+ stars) and read recent reviews. Look for responsive developers who actively answer support questions. Poor support means you’re on your own when problems arise.
4. Is it compatible with your theme and other plugins? Before installing, verify compatibility with your WordPress version and existing plugins. Check the plugin’s compatibility notes and recent reviews for conflict reports.
5. Will it impact site performance? Some plugins are resource hogs that dramatically slow your site. Research performance impact before installation. Lightweight alternatives often exist for bloated popular plugins.
6. Can native WordPress features do the job instead? WordPress has built-in capabilities that many don’t realize. For example, WordPress natively handles basic galleries, menus, and widgets—you don’t need plugins for these unless you need advanced features.
The Plugin Priority Framework
Organize your plugin needs into priority tiers:
Tier 1 – Critical (Must Have):
- Security and backups
- SEO optimization
- Performance optimization
- Contact forms and email delivery
Tier 2 – Important (Should Have):
- Analytics and tracking
- Social media integration
- Caching and speed optimization
- Spam protection
Tier 3 – Nice to Have (Optional):
- Advanced customization
- Additional user experience features
- Marketing automation tools
- Specialized functionality
Start with Tier 1 essentials, then add Tier 2 as needed. Only install Tier 3 plugins if they directly support your business objectives.
Red Flags: Plugins to Avoid
Watch out for these warning signs:
- Nulled or pirated premium plugins – Major security risk, no updates or support
- Plugins with no reviews or extremely low ratings – Usually indicates quality issues
- Plugins promising “magic” results – If it sounds too good to be true, it probably is
- Abandoned plugins – Not updated in 2+ years signals abandonment
- Plugins that request excessive permissions – Unnecessary access is a security concern
- All-in-one mega-plugins – Often bloated with features you’ll never use
The Top 10 Essential Plugins for WordPress
Now let’s explore the essential plugins that belong on virtually every WordPress website. These plugins cover all critical functionality without bloating your site.
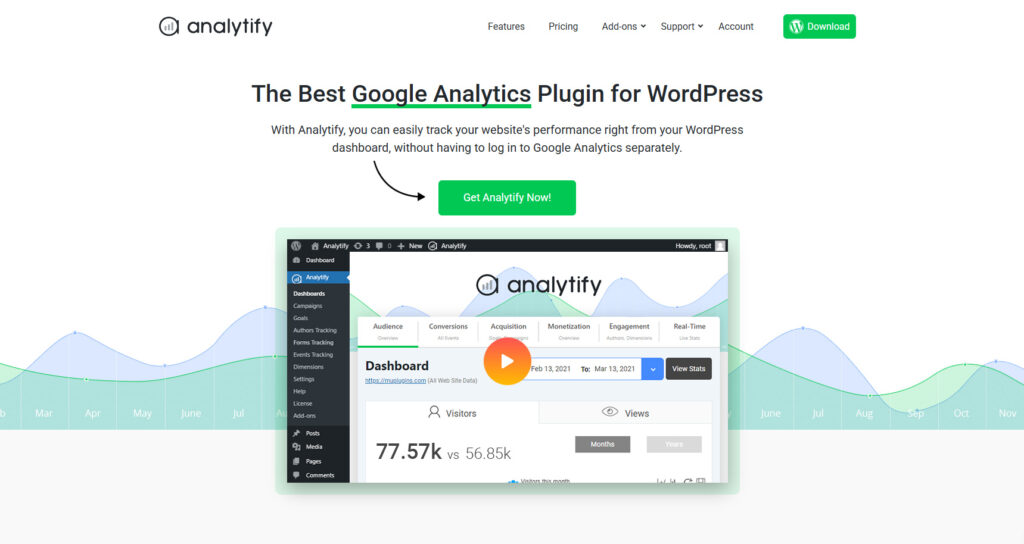
1. Analytify: Google Analytics Inside WordPress

Best Google Analytics Plugin for WordPress
What it does: Brings Google Analytics data directly into your WordPress dashboard with beautiful, easy-to-understand reports.
Why you need it: You can’t improve what you don’t measure. Understanding your website traffic, user behavior, and content performance is fundamental to growth. While Google Analytics is powerful, its interface can be overwhelming for beginners.
Analytify solves this by displaying your most important analytics right where you work—inside WordPress. No more switching tabs or deciphering complex Google Analytics reports.
Key Features:
- Real-time visitor tracking in WordPress dashboard
- Page-level analytics for individual posts and pages
- Top content, referrers, and search terms at a glance
- Easy-to-understand visual reports
- Google AdSense tracking integration
- E-commerce tracking for WooCommerce
- Campaign tracking for marketing initiatives
- Automatic Google Analytics setup (no code required)
Best for: Bloggers, marketers, and business owners who want actionable analytics without the complexity of Google Analytics.
Free vs Pro:
- Free version: Basic analytics, dashboard stats, top pages/posts
- Pro version ($59/year): E-commerce tracking, real-time stats, email reporting, advanced demographics
Pro tip: Set up Analytify immediately after launching your site to build historical data. You’ll thank yourself later when making data-driven decisions about content strategy.
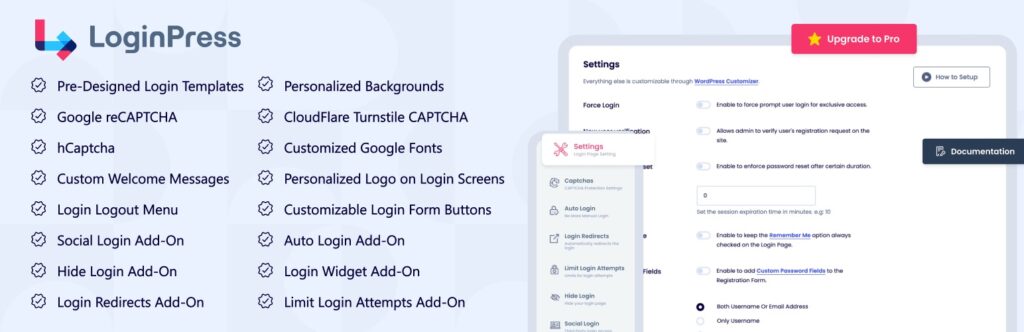
2. LoginPress: Custom Login and Secure UX

LoginPress wp-login Custom Login Page Customizer
What it does: Customizes your WordPress login page and enhances security through better login experiences and protection features.
Why you need it: The default WordPress login page is boring and screams “this is a WordPress site” to potential hackers. Worse, it offers no protection against brute force attacks where hackers try thousands of password combinations.
LoginPress transforms your login experience while adding critical security layers. A professional, branded login page builds trust with users and team members, while security features protect your site from unauthorized access.
Key Features:
- Drag-and-drop login page customizer
- Custom logos, backgrounds, and colors
- Login redirect controls
- Login error messages (without revealing user existence)
- reCAPTCHA integration for bot protection
- Login attempt limiting
- Activity logs showing login attempts
- Two-factor authentication (Pro)
- Social login options (Pro)
Best for: Business websites, membership sites, and anyone serious about WordPress security and branding.
Free vs Pro:
- Free version: Login customization, basic security features
- Pro version ($39/year): 2FA, login attempt limits, social login, activity logs
Security note: Pair LoginPress with other security measures like SSL certificates and regular backups for comprehensive protection.
Simple Social Media Share Buttons – Essential Plugin for WordPress
What it does: Adds social sharing buttons to your posts and pages without slowing down your site.
Why you need it: Social sharing is crucial for content distribution, but most social sharing plugins are bloated with features you’ll never use. They load dozens of scripts that significantly slow page load times.
Simple Social Buttons does exactly what its name suggests—provides clean, fast social sharing without the bloat. Every share amplifies your content reach and brings new visitors to your site.
Key Features:
- Lightweight code (minimal performance impact)
- Share counts display (optional)
- Multiple button styles and positions
- Supports all major social networks (Facebook, Twitter, LinkedIn, Pinterest, etc.)
- Mobile-responsive design
- Customizable colors and sizes
- No external dependencies or heavy scripts
- Works with any theme
Best for: Bloggers, content creators, and businesses wanting to amplify content reach through social sharing.
Free vs Pro:
- Free version: All essential sharing features, multiple platforms
- Pro version ($29/year): Advanced customization, placement options, A/B testing
Performance tip: Only enable social networks your audience actually uses. Every additional button is another HTTP request, so be strategic.

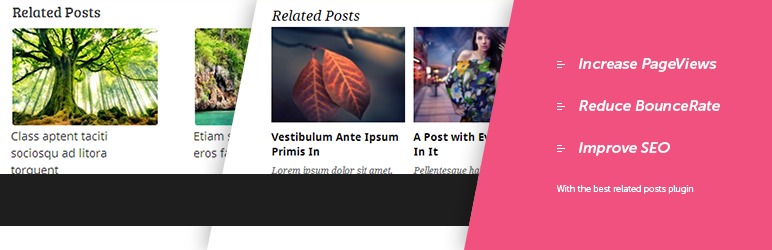
Related Posts Thumbnails Plugin for WordPress
What it does: Displays related posts with attractive thumbnails at the end of your content, encouraging visitors to read more.
Why you need it: The average website visitor leaves after viewing just one page. Related posts combat this by suggesting relevant content that interests readers, increasing engagement, time on site, and pages per session—all positive signals for SEO.
Related Posts Thumbnails uses sophisticated algorithms to find truly relevant content, not just random posts. The thumbnail display is visually appealing and encourages clicks.
Key Features:
- Automatic related post detection based on categories and tags
- Customizable thumbnail sizes and layouts
- Grid or list display options
- Post excerpt display (optional)
- Exclude specific posts or categories
- Custom post type support
- Responsive design for mobile devices
- Lightweight and fast-loading
Best for: Blogs, news sites, and content-heavy websites wanting to increase pageviews and reduce bounce rates.
Free vs Pro:
- Free version: Essential related post functionality with thumbnails
- Pro version ($29/year): Advanced matching algorithms, A/B testing, analytics
SEO benefit: Increased time on site and lower bounce rates signal quality to Google, potentially improving your search engine rankings.
5. UCMM (Under Construction and Maintenance Mode): Control Site Visibility
Under Construction Coming Soon & Maintenance Mode
What it does: Displays a “coming soon” or “maintenance mode” page to visitors while you work on your site behind the scenes.
Why you need it: Launching a half-finished website damages your credibility. Similarly, performing major updates on a live site exposes visitors to broken pages and error messages. UCMM (Under Construction and Maintenance Mode) lets you control exactly what visitors see while you perfect your site.
The plugin is especially valuable when migrating WordPress to a new host, making design changes, or building a new site before launch.
Key Features:
- One-click maintenance mode activation
- Customizable coming soon pages
- Countdown timer for launches
- Email subscription collection
- Social media link integration
- Whitelist specific users or IP addresses
- Mobile-responsive designs
- SEO-friendly (returns proper HTTP headers)
- Custom CSS and HTML support
Best for: New websites under construction, existing sites during major updates, and pre-launch marketing campaigns.
Free vs Pro:
- Free version: Basic maintenance mode with customization
- Pro version ($39/year): Advanced templates, email marketing integration, analytics
Launch strategy: Use UCMM with a countdown timer and email collection to build anticipation and capture leads before your official launch.
WPCode – Insert Headers and Footers + Custom Code Snippets – WordPress Code Manager
What it does: Allows you to easily insert code snippets, scripts, and content into your site’s header or footer without editing theme files.
Why you need it: Many essential services require adding code to your site’s header or footer—Google Analytics, Facebook Pixel, verification codes, custom CSS, and third-party integrations. Editing theme files directly is risky and your changes disappear when you update your theme.
Headers and Footers provides a safe, theme-independent way to add these code snippets that persists through theme changes and updates.
Key Features:
- Insert code in header (before </head> tag)
- Insert code in footer (before </body> tag)
- Insert code after opening <body> tag
- No theme file editing required
- Changes persist through theme updates
- Syntax highlighting for easier editing
- Page-specific code insertion
- Support for any code type (JavaScript, CSS, HTML, meta tags)
Best for: Every WordPress site that uses third-party services, tracking codes, or custom scripts.
Common use cases:
- Google Analytics tracking code
- Facebook Pixel for ad tracking
- Google Tag Manager
- Site verification codes (Google Search Console, Bing)
- Custom fonts from Google Fonts or Adobe Fonts
- Live chat widget scripts
- Heatmap and user behavior tracking (Hotjar, Crazy Egg)
- Custom CSS for design tweaks
Safety tip: Always backup your site before adding new code. Test changes on a staging site first if possible. One misplaced semicolon can break your entire site.
7. Yoast SEO: Optimize for Search Engines
Yoast SEO – Advanced SEO with real-time guidance and built-in AI
What it does: Provides comprehensive SEO tools to optimize your content, technical SEO, and site structure for better search engine rankings.
Why you need it: SEO isn’t optional—it’s how potential customers find you through Google. But technical SEO can be overwhelming for beginners. Yoast SEO simplifies the complex world of search optimization with clear guidance and actionable recommendations.
Yoast is the most popular WordPress SEO plugin with over 5 million active installations. It handles everything from on-page optimization to XML sitemaps to social media integration.
Key Features:
- Real-time content analysis and SEO scoring
- Focus keyword optimization
- Readability analysis
- XML sitemap generation
- Breadcrumb navigation
- Social media preview and optimization
- Schema markup (structured data)
- Duplicate content prevention (canonical URLs)
- Meta title and description templates
- Internal linking suggestions
- Cornerstone content identification
Best for: Anyone serious about ranking in search engines—from beginner bloggers to established businesses.
Free vs Pro:
- Free version: All core SEO features (sufficient for most users)
- Pro version ($99/year): Multiple focus keywords, redirect manager, internal linking suggestions, 24/7 support
SEO strategy: Combine Yoast SEO with these top SEO strategies and follow this SEO guide for beginners for comprehensive optimization.
Important note: Yoast SEO is powerful but not magic. Green lights don’t guarantee rankings—focus on creating genuinely helpful content for your audience while following Yoast’s technical guidance.
8. UpdraftPlus: WP Backup & Migration Plugin
UpdraftPlus WP Backup & Migration Plugin
What it does: Automatically backs up your entire WordPress site to cloud storage and provides simple one-click restoration when needed.
Why you need it: Backups are insurance for your website. Hacks, server failures, plugin conflicts, and human errors can destroy months or years of work in seconds. Without backups, you’re gambling with your online presence.
UpdraftPlus is the most popular backup plugin for WordPress because it makes backup and restoration genuinely simple, even for non-technical users.
Key Features:
- Automated scheduled backups (daily, weekly, monthly)
- Multiple cloud storage options (Google Drive, Dropbox, Amazon S3)
- One-click restoration
- Separate database and file backups
- Manual backup creation anytime
- Backup encryption
- Email notifications for backup status
- Migration and cloning tools (Pro)
- Incremental backups (Pro)
Best for: Every WordPress site. Period. Backups aren’t optional.
Free vs Pro:
- Free version: Complete backup and restore functionality (sufficient for most small sites)
- Pro version ($70/year): Incremental backups, migration tools, priority support, advanced scheduling
Critical reminder: Backups only work if you test them. Run a test restoration at least once to verify your backups actually work. The worst time to discover backup problems is during an emergency.
Comprehensive backup guide: Learn more about WordPress backup best practices and why automated backups are essential for WordPress security.

WP Mail SMTP by Mailchimp
What it does: Ensures WordPress emails (contact forms, password resets, notifications) actually reach recipients’ inboxes instead of spam folders.
Why you need it: Here’s a dirty secret about WordPress: the default email sending method is unreliable. Many hosting servers aren’t configured properly for email delivery, causing WordPress emails to bounce or land in spam folders.
You might not even realize you’re missing important contact form submissions, user notifications, or password reset requests. WP Mail SMTP fixes this by routing emails through reliable SMTP services.
Key Features:
- Easy SMTP configuration
- Multiple mailer options (Gmail, Outlook, SendGrid, Mailgun, etc.)
- Email logging (see what’s being sent and track delivery)
- Test email functionality
- White glove setup service (Pro)
- Detailed documentation for all major email services
- Backup SMTP connection (Pro)
- Smart routing (Pro)
Best for: Every WordPress site with contact forms, user registrations, or any email functionality.
Free vs Pro:
- Free version: Full SMTP functionality with multiple mailer options
- Pro version ($49/year): Email logging, white glove setup, backup connections
Popular SMTP services to use:
- Gmail: Free for personal use, reliable
- SendGrid: Free for 100 emails/day
- Mailgun: Free for 5,000 emails/month
- Postmark: Excellent deliverability, paid service
- Amazon SES: Pay-as-you-go, extremely reliable
Setup tip: After configuring WP Mail SMTP, send a test email to multiple addresses (Gmail, Yahoo, Outlook) and check if they arrive in inbox or spam folder.
10. Smush: Image Optimization | Convert WebP & AVIF

Smush Image Optimization Convert WebP & AVIF
What it does: Automatically compresses and optimizes images to reduce file sizes without visible quality loss, dramatically improving site speed.
Why you need it: Images typically account for 50-90% of total page weight. Unoptimized images are the #1 cause of slow WordPress sites. Slow sites frustrate visitors, increase bounce rates, and hurt search engine rankings.
Smush optimizes images automatically as you upload them, ensuring your site stays fast without requiring manual image compression.
Key Features:
- Automatic image compression on upload
- Bulk optimization for existing images
- Lossless and lossy compression options
- Lazy loading (images load only when visible)
- WebP conversion for modern browsers
- Image resizing (detect and resize oversized images)
- CDN delivery (Pro)
- Incorrect size image detection
- Works with any WordPress theme
Best for: Every WordPress site with images—especially photography sites, portfolios, e-commerce stores, and image-heavy blogs.
Free vs Pro:
- Free version: Compress 50 images at a time, essential optimization features
- Pro version ($49/year): Unlimited compressions, lossy compression, CDN, auto-resize
Performance impact: Optimized images can reduce page size by 50-70%, cutting load times from 5 seconds to 2 seconds—a massive improvement for WordPress performance and user experience.
Best practice: Always optimize images before uploading when possible, then use Smush as a safety net. Consider running bulk optimization on existing images after installation.
How These Plugins Work Together: Real-World Setup Scenarios
Understanding how these essential plugins complement each other helps you build a cohesive WordPress site. Here are practical scenarios showing how they work together.
Scenario 1: Launching a New Business Website
Your goal: Create a professional website with analytics, SEO, and lead generation capabilities.
Essential plugin stack:
- UCMM – Hide site from public while building
- Yoast SEO – Optimize all pages before launch
- Smush – Optimize images for fast loading
- Headers and Footers – Add Google Analytics tracking code
- Analytify – Monitor traffic after launch
- WP Mail SMTP – Ensure contact form submissions arrive
- UpdraftPlus – Backup before and after launch
- LoginPress – Brand login page and secure admin access
Workflow: Enable UCMM immediately to show “coming soon” page → Build site with Yoast SEO guidance → Optimize images with Smush → Add tracking codes via Headers and Footers → Configure contact form with WP Mail SMTP → Set up automated backups with UpdraftPlus → Customize and secure login with LoginPress → Launch site and monitor with Analytify
Scenario 2: Optimizing an Existing Blog for Growth
Your goal: Improve SEO rankings, increase engagement, and protect your content investment.
Essential plugin stack:
- Yoast SEO – Audit and optimize existing content
- Related Posts Thumbnails – Keep readers on site longer
- Simple Social Buttons – Enable content sharing
- Analytify – Track which content performs best
- Smush – Bulk optimize all existing images
- UpdraftPlus – Protect years of content with backups
- Headers and Footers – Add Facebook Pixel for remarketing
Workflow: Install Yoast SEO and audit current content → Bulk optimize images with Smush → Add Related Posts to increase pages per session → Enable social sharing with Simple Social Buttons → Set up analytics with Analytify → Implement automated backups with UpdraftPlus → Add remarketing tracking via Headers and Footers
Scenario 3: Securing an E-commerce Site
Your goal: Protect customer data, ensure transaction emails deliver, and maintain site uptime.
Essential plugin stack:
- UpdraftPlus – Daily automated backups to cloud storage
- LoginPress – Limit login attempts, add 2FA
- WP Mail SMTP – Reliable order confirmation emails
- UCMM – Maintenance mode for updates without disruption
- Smush – Optimize product images for fast browsing
- Analytify – Track conversion funnels and cart abandonment
- Yoast SEO – Optimize product pages for search
Workflow: Implement daily backups with UpdraftPlus → Secure login with LoginPress (2FA enabled) → Configure reliable transactional email with WP Mail SMTP → Optimize all product images with Smush → Set up conversion tracking with Analytify → Optimize product pages with Yoast SEO → Use UCMM for maintenance windows
Scenario 4: Building a Portfolio Website
Your goal: Showcase work beautifully, rank for relevant searches, and collect inquiries.
Essential plugin stack:
- Smush – Optimize portfolio images without quality loss
- LoginPress – Branded login experience
- Yoast SEO – Optimize portfolio pieces for discovery
- Simple Social Buttons – Enable work sharing
- WP Mail SMTP – Ensure inquiry form submissions arrive
- UpdraftPlus – Protect portfolio and testimonials
- Headers and Footers – Add custom fonts and tracking
Workflow: Optimize all portfolio images with Smush → Brand site completely including login with LoginPress → Optimize each portfolio piece with Yoast SEO → Enable social sharing with Simple Social Buttons → Configure contact form delivery with WP Mail SMTP → Set up backups with UpdraftPlus → Add custom typography and analytics via Headers and Footers
Best Practices When Installing Plugins
Follow these best practices to avoid common pitfalls and maintain a healthy WordPress site.
Before Installing Any Plugin
1. Research thoroughly Don’t install plugins impulsively. Check:
- Last update date (within 6 months is ideal)
- Active installations (higher is generally better)
- User ratings (4+ stars minimum)
- Support forum activity (responsive developers)
- Compatibility with your WordPress version
2. Create a backup Always backup your site before installing new plugins, especially major ones that affect core functionality. Use UpdraftPlus to create a manual backup with one click.
3. Check plugin permissions Review what the plugin requests access to. Be skeptical of plugins requesting unnecessary permissions or access to sensitive data.
4. Test on staging first (if possible) If you have a staging environment, install and test new plugins there before deploying to your live site. This catches compatibility conflicts before they affect visitors.
During Installation
1. Install from official sources only Only install plugins from:
- WordPress.org plugin repository
- Reputable developer websites
- Official marketplaces (CodeCanyon with caution)
Never install nulled (pirated) premium plugins. They often contain malware and won’t receive updates or support.
2. Review settings immediately Don’t just activate and forget. Review all plugin settings to ensure proper configuration. Default settings aren’t always optimal for your specific needs.
3. Test functionality After activation, test the plugin’s functionality thoroughly:
- Does it work as expected?
- Does it conflict with other plugins?
- Does it slow down your site noticeably?
- Does it break any existing functionality?
4. Document your configuration Keep notes on important plugin settings, especially for security and backup plugins. This documentation is invaluable when troubleshooting or migrating to a new host.
After Installation
1. Monitor performance impact Use tools like GTmetrix, Google PageSpeed Insights, or Pingdom to measure site speed before and after plugin installation. Uninstall plugins that significantly degrade performance.
2. Set up automatic updates (carefully) Enable automatic updates for security and maintenance plugins like UpdraftPlus and LoginPress. Be more cautious with plugins that directly affect site design or functionality—test major updates on staging first.
3. Schedule regular plugin audits Quarterly, review all installed plugins:
- Are you actually using each one?
- Are there lighter alternatives available?
- Are any abandoned or unmaintained?
- Can any be consolidated?
4. Keep plugins updated Outdated plugins are security vulnerabilities waiting to be exploited. Check for updates weekly and install them promptly (after backing up).
Plugin Organization Tips
Use descriptive names for plugin-created pages When plugins create pages (like contact forms or privacy policies), use clear, descriptive names and URLs for better organization and SEO.
Group similar functionality Avoid installing multiple plugins that do similar things. Choose one comprehensive solution instead of three partial ones.
Bookmark important settings pages Use your browser’s bookmark feature to create quick links to frequently accessed plugin settings pages.
When to Remove a Plugin
Uninstall plugins that:
- You haven’t used in 3+ months
- Are abandoned by developers (no updates in 1+ year)
- Cause frequent conflicts or errors
- Significantly slow down your site
- Have been replaced by better alternatives
- Duplicate functionality of other plugins or WordPress core features
Proper removal process:
- Backup your site first
- Deactivate the plugin
- Verify site still functions properly
- Delete the plugin files completely
- Clean up any database tables left behind (use plugin deactivation tools if provided)
Quick Comparison: Free vs Pro Versions
Understanding when to upgrade to premium versions helps you invest wisely. Here’s a practical comparison:
| Plugin | Free Version Sufficient For | Upgrade to Pro When |
|---|
| Analytify | Personal blogs, small sites | Need e-commerce tracking, real-time stats, or email reports |
| LoginPress | Basic login customization | Need 2FA, social login, or advanced security features |
| Simple Social Buttons | Standard social sharing | Want advanced customization, A/B testing, or detailed analytics |
| Related Posts | Basic content recommendations | Need advanced matching algorithms or analytics integration |
| UCMM | Simple maintenance pages | Need advanced templates, email marketing integration |
| Headers and Footers | Basic code insertion | Free version covers all needs for most users |
| Yoast SEO | Complete SEO for most sites | Need multiple focus keywords, redirect manager, or 24/7 support |
| UpdraftPlus | Small to medium sites | Large sites need incremental backups, migration tools, or priority support |
| WP Mail SMTP | Reliable email delivery | Need email logging, white glove setup, or backup connections |
| Smush | Light image optimization | Heavy image sites need unlimited compression, CDN, auto-resize |
Cost-Benefit Analysis
When free versions are sufficient:
- You’re starting out with limited budget
- Your site has basic requirements
- Traffic and complexity are low
- You can handle basic troubleshooting yourself
When premium is worth the investment:
- Your site generates revenue
- You need advanced features daily
- Support and documentation are important
- Time savings justify the cost
- You’re managing client or business-critical sites
Budget-friendly approach: Start with free versions of all plugins. Upgrade individually as you encounter limitations or as your site grows. This lets you spread costs while learning which premium features you actually need.
FAQs About Essential Plugins for WordPress
How many plugins should I have on my WordPress site?
Quality matters more than quantity. Most well-optimized sites run 15-25 plugins. Focus on essential functionality and choose lightweight, well-coded plugins. Too many plugins can slow your site and create security vulnerabilities, but too few means you’re missing critical features.
Will these plugins slow down my WordPress site?
The plugins recommended in this guide are chosen for their efficiency. However, any plugin adds some code to your site. Follow these WordPress performance tips to ensure your site stays fast. Always test site speed before and after installing plugins.
Can I use all these plugins together?
Yes, these plugins are designed to work independently and won’t conflict with each other. They cover different aspects of WordPress functionality—analytics, SEO, security, backups, performance, and user experience. Together they create a comprehensive foundation for any WordPress site.
What’s the total cost of using these essential plugins?
You can use the free versions of all these plugins at zero cost. If you upgrade all to premium versions, the total would be approximately $400-500/year. However, most users only need 2-3 premium upgrades based on their specific needs, bringing the annual cost to $100-200.
Do I need different plugins for e-commerce sites?
The essential plugins in this guide work for all WordPress sites, including e-commerce. However, you’ll also need WooCommerce (or similar) for shop functionality, plus payment gateway plugins. The security (LoginPress), backup (UpdraftPlus), and performance (Smush) plugins become even more critical for online stores.
Can plugins conflict with my WordPress theme?
Conflicts are possible but rare with quality plugins and themes. The plugins in this guide are compatible with all major themes. If you experience conflicts, check for theme/plugin updates first, then contact support. Choose well-coded themes from reputable developers to minimize conflict risk.
How do I know if a plugin is safe and secure?
Check these indicators:
- Available in official WordPress plugin repository
- Regular updates (last updated within 6 months)
- High number of active installations
- Good ratings (4+ stars)
- Responsive support forum
- Clear privacy policy
- Transparent developer information
Avoid nulled plugins, plugins from unknown sources, and those with poor reviews citing security issues.
Should I update plugins automatically or manually?
Enable automatic updates for security-critical plugins like backups and security tools. For plugins affecting site functionality or design, consider manual updates so you can test changes on a staging site first. Always backup before major updates regardless of update method.
What happens if I deactivate or delete a plugin?
Deactivating turns off the plugin but keeps settings. Deleting removes the plugin files and may delete settings (some plugins allow data retention). Always backup before removing plugins. Test site functionality after removal to ensure everything still works correctly.
Do I need all 10 plugins right away?
No. Start with the most critical: Yoast SEO, UpdraftPlus, and WP Mail SMTP. Add others as you need them. New sites can skip Related Posts and Analytify until you have content and traffic. UCMM is only needed during construction or maintenance periods.
Can free plugins be trusted for business websites?
Yes, many excellent free plugins are maintained by reputable developers and used by millions of sites. The free versions in this guide are perfectly suitable for business use. Premium versions offer additional features and support but aren’t required for reliable functionality.
How often should I audit my installed plugins?
Review your plugin list quarterly (every 3 months). Check for:
- Plugins you’re not actively using
- Plugins with available updates
- Abandoned plugins (no updates in 1+ year)
- Better alternatives that have emerged
- Functionality now available in WordPress core
Delete unused or outdated plugins to maintain site health and security.
Conclusion: Essential Plugins for WordPress
Building a successful WordPress site doesn’t require dozens of plugins—it requires the right plugins strategically chosen to support your goals.
Campground, General, RV Park, Web Design & Development, Website Design Services
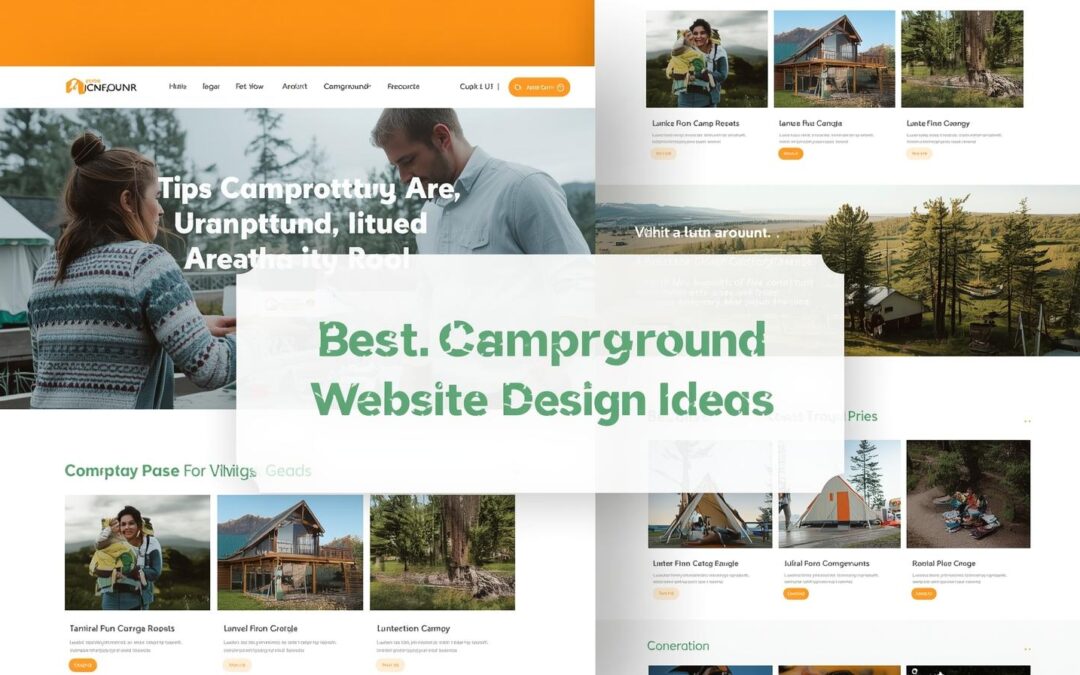
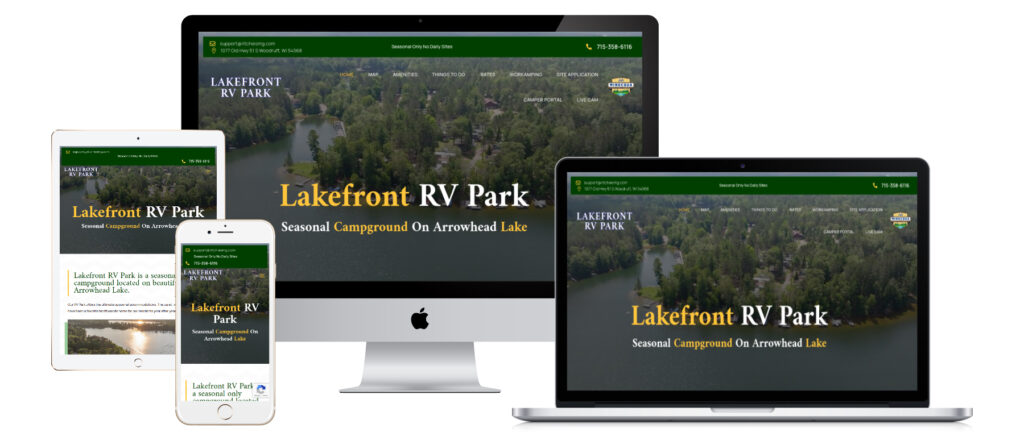
Best Campground Website Design Ideas to Boost Bookings in 2026
Running a campground or RV park means your website is often the first impression guests have of your property. A well-designed campground website not only showcases your beautiful outdoor spaces but also makes booking effortless.
In this guide, you’ll learn how to create a modern, user-friendly, and search-optimized campground website that converts visitors into happy campers.
1. Focus on a Mobile-Friendly Design
More than 70% of travelers browse and book camping spots using their phones. Your campground website must look and function perfectly on every screen size.
A mobile-friendly campground website should:
- Load fast, even on weak cell signals
- Have easy-to-tap buttons for booking or calling
- Feature text and images that resize automatically
- Include a simplified menu with clear navigation
💡 Pro Tip: Test your site on Google’s Mobile-Friendly Test tool to see how it performs on different devices.

Responsive campground website design on mobile and desktop
2. Showcase Your Campground’s Unique Features
What makes your campground stand out? Maybe it’s a lakeside view, family-friendly playground, or cozy fire pits. Highlight your unique amenities with photos, short descriptions, and even icons to help guests quickly see what’s available.
Consider adding a dedicated “Amenities” page that includes:
- Pool or hot tub
- Dog-friendly areas
- Nature trails or fishing spots
- Wi-Fi and RV hookups
- Clubhouse, gym, or game area
The clearer and more inviting your amenities look online, the easier it becomes for visitors to imagine their stay.

Guests enjoying campground amenities like pool and playground
3. Use Authentic, High-Quality Photos
Real photos create trust and emotional connection. Skip generic stock images—show real campers enjoying your spaces, your staff greeting guests, and the natural beauty of your grounds.
Capture:
- Your entrance sign and reception area
- Aerial shots of the campground layout
- Families roasting marshmallows or hiking
- Clean restrooms, cabins, or RV sites
- Sunset or lake views
📷 Pro Tip: Hire a local real estate photographer. They understand lighting and space, helping your campground look stunning online.

Photographer taking pictures of campground for website
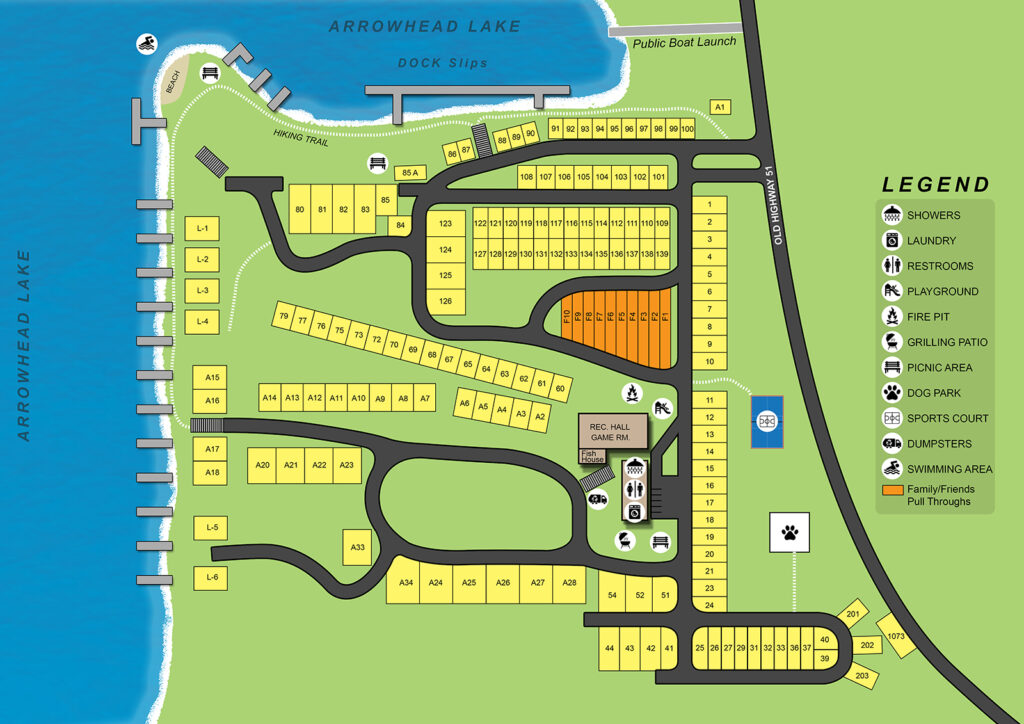
4. Include a Clear Campground Map
Campers love knowing exactly where they’ll stay. Add an interactive or downloadable map that shows site numbers, trails, restrooms, and activity areas.
This helps guests choose the perfect site—like one near the playground or far from the noise. It also reduces confusion and check-in time for your staff.

Interactive campground map showing site layout and amenities
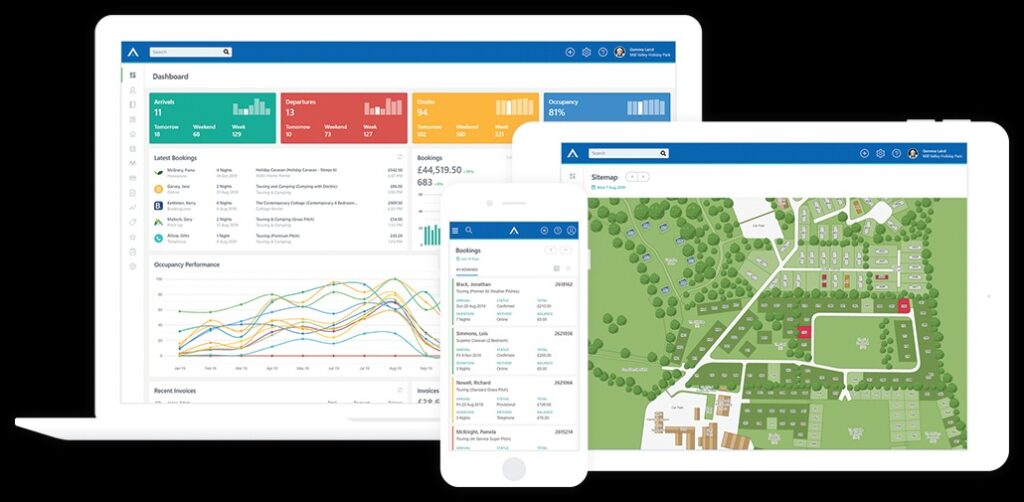
5. Add Easy Online Reservations
Convenience is everything. Integrate an online reservation system or booking form on your website.
Benefits include:
- Instant confirmation for campers
- Fewer phone calls for staff
- 24/7 booking access
- Integration with payment and availability calendars
If you don’t use booking software, include a “Book Now” button that links to a contact form or phone number.

Online reservation system for campground website
6. Display Contact Information Everywhere
Your phone number, address, and email should be visible on every page—ideally in the header and footer.
Add:
- Clickable phone numbers for mobile users
- Links to your Google Maps location
- A contact form with name, email, and message fields
This helps build trust and reduces friction when guests are ready to reach out.
7. Avoid Outdated Web Design Mistakes
A cluttered, outdated website can make your campground look neglected. Avoid:
- Flashing banners or moving GIFs
- Tiny, low-quality photos
- Outdated copyright years
- Autoplay music or videos
- Overstuffed homepages with too many announcements
Instead, focus on simplicity, consistent branding, and modern fonts that reflect your campground’s personality.
8. Optimize for SEO
Search engine optimization (SEO) helps campers find your website.
Include targeted keywords like “campgrounds near [your location]” throughout your site. Optimize your:
🌿 Pro Tip: Write blog posts like “Best Things to Do Near [Your Campground Name]” to attract local search traffic.
9. Ensure ADA Compliance
Accessibility is both a moral and legal requirement. Follow WCAG guidelines to make your website usable for all visitors.
Check for:
- Text color contrast
- Keyboard navigation
- Alt text for images
- Descriptive links
Tools like WAVE or AccessiBe can help identify and fix accessibility issues.
10. Keep Your Website Updated
Update your photos, pricing, and event calendar regularly. Seasonal updates show Google (and visitors) that your site is active.
If you’re too busy managing your campground, consider hiring a web design service that specializes in campgrounds to handle updates for you.
Conclusion
A great campground website blends design, usability, and strategy. Focus on a mobile-friendly layout, real photography, easy booking, and strong SEO, and your site will naturally convert visitors into guests.
The better your website looks and performs, the more likely campers are to book directly—saving you time and boosting your bottom line.
If you’re ready to modernize your online presence and attract more happy campers,
👉 contact us today to learn more about our RV Park Website Design Service.
Related articles:
Frequently Asked Questions
1. Why is a mobile-friendly campground website important?
Because most travelers use smartphones to search and book their stays. A responsive design ensures a smooth experience across devices and helps your site rank higher on Google.
2. How can professional photos improve my campground website?
They make your property look inviting and trustworthy, encouraging visitors to book instead of browsing elsewhere.
3. What should I include on my campground homepage?
A brief intro, beautiful hero image, amenities summary, map link, and a visible “Book Now” button.
4. How often should I update my website?
At least every season. Refresh photos, update pricing, and post new events to show that your campground is active and welcoming year-round.
General
Changing your domain name can feel like navigating a minefield for SEO. A single misstep could tank your rankings, erase hard-earned traffic, and disrupt your online presence. But with the right strategy, you can transition smoothly while preserving (or even boosting) your SEO performance. This guide walks you through the process step-by-step, shares best practices, and answers critical questions to ensure your domain migration succeeds.
Why Change Your Domain Name?
Before diving into the how, let’s address the why. Common reasons to change your domain include:
- Rebranding: Aligning your domain with a new brand identity.
- Better Name: Switching to a shorter, memorable, or keyword-rich domain.
- Merging Websites: Consolidating multiple sites into one.
- Targeting New Markets: Using a country-specific TLD (e.g., .uk, .ca).
- Escaping Penalties: Moving away from a domain flagged by Google for spam.
Whatever your reason, proceed cautiously—domain changes require meticulous planning.
How to Change Domain Name: Quick Start
Follow these six steps to minimize SEO disruptions:
Step 1: Decide on the New Domain, and Buy It
- Choose a domain that’s brandable, easy to spell, and relevant to your niche.
- Avoid hyphens or numbers to prevent user confusion.
- Use tools like Ahrefs or SEMrush to check the domain’s history for penalties.
Step 2: Do a Full SEO Audit of Your Content
- Audit existing pages using tools like Screaming Frog.
- Fix broken links, optimize meta tags, and update outdated content.
- Note high-performing pages—these need extra care during migration.
Step 3: Back Up Your Current Website
- Save all files, databases, and content. Use plugins like UpdraftPlus (WordPress) or manually export your site.
Step 4: Create 301 Redirects Using .htaccess
Step 5: Tell Google You Moved
- Use Google Search Console’s Change of Address tool.
- Submit an updated sitemap for the new domain.
Step 6: Enjoy Your New Site!
- Monitor rankings and traffic closely for 3–6 months.
Changing Your Domain Name: Best Practices
- Educate Yourself on SEO & Domain Migration
- Hire an SEO Expert for Complex Migrations
- Experts handle technical issues like canonical tags, hreflang, or international SEO.
- Think Through URL Structure Changes
- Keep URLs consistent if possible (e.g.,
/blog/post-name remains the same).
- If Merging Sites, Clean Both First
- Remove duplicate content and fix broken links on both domains.
- Monitor Everything Post-Launch
- Track rankings, traffic, crawl errors, and indexation via Google Analytics and Search Console.
- Prepare for Months of Fluctuating Traffic
- Temporary dips are normal as Google re-indexes your site.
- Announce Your New Domain
- Update social profiles, email signatures, and run a “We’ve Moved” campaign.
- Update Other Web Properties
- Fix links in directories, guest posts, and partnerships.
- Double-Check 301 Redirects
- Broken redirects = lost SEO value.
Example of a Featured Snippet
Q: How long does it take for SEO to recover after a domain change?
A: Most sites see rankings stabilize within 2–4 months, assuming proper 301 redirects and minimal technical errors.
Questions on How to Change Your Domain Name?
Q: Will changing my domain name reset my SEO progress?
A: Not if done correctly. 301 redirects preserve link equity, and consistent content keeps rankings intact.
Q: Can I change my domain without losing backlinks?
A: Yes—implement 301 redirects to ensure old links point to the new domain.
Q: Do 301 redirects slow down my site?
A: Poorly configured redirects can. Avoid chains and keep redirects server-side.
Q: Should I keep my old domain live forever?
A: No, but leave redirects active for at least 12 months.
Key Takeaways
- Plan meticulously: Audit, back up, and map redirects before launching.
- Prioritize user experience: Ensure visitors (and search engines) land on the right pages.
- Monitor rigorously: Use tools to catch issues early.
By following this guide, you’ll protect your SEO equity and set your new domain up for long-term success. 🚀
Need help with your domain migration? Black Web Spider specializes in seamless, SEO-friendly transitions. Contact us today!
Related Topics:
- change domain name without losing SEO
- how to migrate domain name”, “SEO-friendly domain change”, “301 redirect best practices
- how to change domain name without affecting ranking”, “steps to change domain name safely